
Are you looking for a cost-effective way to give your kitchen a fresh new look? A DIY kitchen backsplash can be a fantastic solution, offering endless design possibilities and the satisfaction of creating something with your own hands. With the right materials and some basic knowledge, you can achieve a professional-looking result without breaking the bank. In this comprehensive guide, we’ll explore the world of DIY kitchen backsplashes, covering everything from the easiest installation methods to the most stylish design ideas.

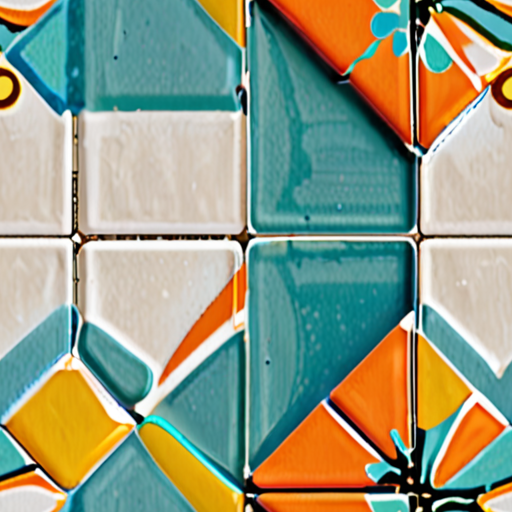
Easy DIY Backsplash Ideas
We’ve got you covered with these easy DIY backsplash ideas that’ll elevate your kitchen’s style without breaking the bank.
-
Peel-and-Stick Vinyl Tiles
A great option for renters or those who want a temporary solution, peel-and-stick vinyl tiles come in various designs and patterns. They’re easy to install and remove, making them perfect for kitchens with high moisture levels.
-
Faux Brick Backsplash
This DIY backsplash idea involves applying a faux brick finish to your wall using a combination of paint and texture paste. It’s a cost-effective alternative to real brick and can give your kitchen a rustic charm.
-
Beadboard Backsplash
Beadboard is a type of paneling made from thin strips of wood. It’s lightweight, easy to install, and adds a classic touch to your kitchen. You can stain or paint it to match your cabinets and countertops.
-
Pressed Tin Backsplash
For a unique and eye-catching look, consider a pressed tin backsplash. This DIY project involves attaching metal panels to your wall using adhesive or screws. It’s a great way to add industrial chic to your kitchen.
-
Wallpaper Backsplash
Yes, you read that right! Wallpaper can make a stunning backsplash. Choose a design that complements your kitchen’s style, and apply it using a special adhesive. It’s a great way to add color and pattern to your kitchen without committing to a permanent installation.
These easy DIY backsplash ideas will help you achieve a stylish and functional kitchen without breaking the bank. Remember to choose materials that are durable and easy to clean, and don’t hesitate to get creative with your design!
Can I Do a Kitchen Backsplash Myself?
A kitchen backsplash is a great DIY project that can add style and functionality to your kitchen.
- Determine the scope of your project
- Choose the materials you want to use
- Plan the layout and design of your backsplash
- Gather the necessary tools and supplies
- Prepare the surface for installation
- Install the tiles or material of your choice
- Grout and seal the tiles
- Clean up and inspect the finished product
Materials Needed:
- Tiles or material of your choice
- Tile adhesive
- Grout
- Sealer
- Measuring tape
- Square
- Pencil and marker
- Notched trowel
- Spacers
- Grout float
- Grout sponge
- Sealing brush
Tools Needed:
- Tile cutter or wet saw
- Drill
- Masonry bit
- Hammer
- Trowel
- Putty knife
- Grout spreader
- Grout sponge
- Sealing brush
Step-by-Step Instructions:
- Measure the area where you plan to install the backsplash and mark the location of the studs.
- Apply tile adhesive to the wall and begin installing the tiles, working from the center outward.
- Use spacers to maintain even spacing between the tiles.
- Allow the adhesive to dry completely before grouting the tiles.
- Grout the tiles, using a grout float to spread the grout evenly.
- Wipe away excess grout with a damp sponge.
- Allow the grout to dry completely before sealing the tiles.
- Apply sealer to the tiles, following the manufacturer’s instructions.
- Allow the sealer to dry completely before cleaning the backsplash.
Tips and Considerations:
- Make sure to choose materials that are suitable for your kitchen environment.
- Consider hiring a professional if you are unsure about any aspect of the installation process.
- Take necessary safety precautions when working with power tools and chemicals.
- Follow the manufacturer’s instructions for any products you use.
Conclusion:
With these steps and considerations, you can successfully complete a kitchen backsplash project yourself.
How Long Do Peel-and-Stick Backsplashes Last?
When installed and maintained properly, peel-and-stick backsplash tiles can last anywhere from five to twenty years.
- The lifespan of these tiles depends on various factors, including exposure to water and heat.
- In high-water or high-heat areas, the lifespan may be significantly reduced.
We recommend checking the manufacturer’s instructions for specific maintenance recommendations.
For optimal performance, it’s essential to clean the tiles regularly and avoid exposing them to extreme temperatures or moisture.
By following these guidelines, you can enjoy your peel-and-stick backsplash for many years to come.
At Peck and Gartner, we understand the importance of choosing the right materials for your home renovation projects.
Our team is dedicated to providing you with the knowledge and expertise needed to make informed decisions.
Whether you’re looking for DIY project ideas or seeking professional advice, we’ve got you covered.
Visit our website at Peck and Gartner to explore our collection of home improvement guides and tutorials.
Don’t hesitate to reach out to us if you have any questions or need further assistance.
We’re always happy to help!
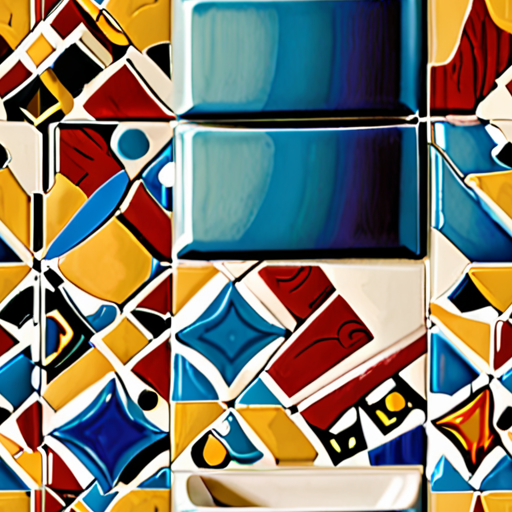
What is the Cheapest Way to Add a Backsplash in the Kitchen?
We’ve got you covered with our top picks for affordable kitchen backsplashes.
- Peel-and-Stick Tiles : A budget-friendly option that’s easy to install and comes in various styles and patterns. They can be cut to fit any space, making them perfect for irregularly shaped areas.
- Chalkboard Paint : Adds a functional and stylish touch to your kitchen where you can write recipes or notes. It’s a great way to keep track of meal plans and grocery lists.
- Mosaic Glass Tile : Create a stunning backsplash with mosaic glass tile. This option is not only visually appealing but also durable and easy to clean.
- DIY Shiplap : Give your kitchen a rustic charm with shiplap. This cost-effective option can be made from reclaimed wood or MDF boards.
- Ceramic Tile : Ceramic tile is a popular choice for kitchen backsplashes due to its durability and ease of maintenance. Look for affordable options at home improvement stores or online retailers.
When choosing the cheapest way to add a backsplash in your kitchen, consider factors like material costs, installation time, and personal style. With these options, you’ll be able to find a solution that fits your budget and enhances your kitchen’s aesthetic.
Additional Tips:
- Measure carefully : Before purchasing materials, measure your kitchen walls accurately to ensure a smooth installation process.
- Choose the right adhesive : Select a suitable adhesive for your chosen material to ensure a strong bond and prevent damage to your walls.
- Consider hiring a professional : If you’re not comfortable with DIY projects or lack experience with tile installation, consider hiring a professional to ensure a high-quality finish.
Get Creative and Save Money:
Think outside the box and explore unconventional materials like old CDs, glass bottles, or even fabric to create a unique and budget-friendly backsplash.
By considering these affordable options and tips, you’ll be able to add a stylish and functional backsplash to your kitchen without breaking the bank.
Alternatives to Backsplashes
We understand that installing a traditional backsplash can be expensive and time-consuming, which is why we’ve compiled a list of easy alternatives to consider.
- Painted Walls
- Wallpaper
- Peel-and-Stick Tiles
- Shiplap
- Stencils
A simple yet effective solution is to paint the walls behind your countertops a color that complements your kitchen decor. This approach eliminates the need for tile installation and can save you money on materials and labor costs.
Another option is to install wallpaper behind your countertops. This adds visual interest to your kitchen and can be easily removed if you decide to change your design style in the future.
For a more durable and low-maintenance option, consider using peel-and-stick tiles. These tiles are easy to apply and remove, making them perfect for renters or those who want to update their kitchen without committing to a long-term installation.
If you’re looking for a more rustic or farmhouse-inspired look, consider installing shiplap behind your countertops. This adds texture and visual interest to your kitchen and can be stained or painted to match your desired aesthetic.
For a temporary or rental-friendly solution, consider using stencils to add a decorative design element to your kitchen walls. This is a great way to add personality to your space without making a long-term commitment.
At Peck and Gartner, we believe that every homeowner deserves a beautiful and functional kitchen, regardless of budget or design style. By considering these easy alternatives to backsplashes, you can create a stunning kitchen that reflects your personal taste and preferences.
Is Peel and Stick Backsplash Easy to Install?
As a homeowner, installing a backsplash can seem like a daunting task, but with the rise of peel and stick backsplashes, it has become easier than ever.
- The biggest advantage of peel and stick backsplashes is their ease of installation.
- All you need to do is measure the space, peel off the backing, and stick the tile sheet to the wall.
- This eliminates the need for messy adhesives, grout, and tile spacers, making the process much faster and cleaner.
However, it’s essential to note that not all peel and stick backsplashes are created equal.
- Some may require special preparation, such as cleaning the surface or applying a primer.
- Others may have specific installation requirements, like aligning patterns or spacing tiles evenly.
To ensure a successful installation, it’s crucial to choose a high-quality peel and stick backsplash that suits your needs and follows the manufacturer’s instructions.
Additionally, consider factors like durability, moisture resistance, and ease of removal when selecting a peel and stick backsplash.
With the right product and a little patience, you can achieve a professional-looking result without breaking the bank or sacrificing too much time.
Benefits of Peel and Stick Backsplashes
- Ease of installation
- No mess or cleanup required
- Faster installation time
- Cleaner installation process
Things to Consider Before Installing a Peel and Stick Backsplash
- Choose a high-quality product
- Follow manufacturer’s instructions
- Consider durability and moisture resistance
- Think about ease of removal
Conclusion
In conclusion, peel and stick backsplashes offer a convenient and hassle-free solution for homeowners who want to update their kitchen or bathroom without the stress of traditional tile installation.
By choosing the right product and following the manufacturer’s instructions, you can achieve a beautiful and long-lasting result that enhances the aesthetic appeal of your space.

0 Comments