

Running out of space under your sink can quickly turn a tidy bathroom into a chaotic one. However, with a bit of creativity and effort, you can transform your under-sink area into a well-organized haven. DIY under-sink storage ideas offer a cost-effective and personalized way to maximize space while adding functionality to your bathroom. Whether you’re looking to recycle old materials or streamline your existing setup, there are countless ways to create custom storage solutions tailored to your unique needs. From sleek under-sink cabinets to compact organizers, this article dives into the best DIY under-sink storage ideas, complete with tips on how to build, customize, and maintain these space-saving marvels. Discover how you can elevate your bathroom’s efficiency with easy-to-follow guides and expert advice, ensuring every corner of your space is utilized wisely. Get ready to unlock the potential of your under-sink area and enjoy a cleaner, more organized bathroom experience.
Key Takeaways: Transform Your Bathroom Storage
- Maximize Space Efficiently: Utilize vertical shelf units and innovative storage solutions to turn under-sink spaces into organized havens.
- Customizable Solutions: Install adjustable shelving or pre-built modular units for a personalized storage setup tailored to your bathroom needs.
- Organize with Baskets: Incorporate decorative or functional baskets to keep essentials accessible and visible.
- Convenient Organizers: Enhance your space with hooks or pull-out trays to store small items neatly and efficiently.
- Create Functional Drawers: Build custom drawers to house larger items, ensuring easy access and a clutter-free environment.
- Vertical Storage Solutions: Don’t overlook space above the toilet paper holder—install shelves to store extra rolls.
- Durable Modular Units: Opt for pre-fabricated modular units that offer adjustable compartments, perfect for varying storage requirements.
- Protective Materials: Use water-resistant materials to safeguard your storage solutions against moisture damage.
- Improve Functionality: Add LED lighting under shelves for enhanced visibility and a more functional workspace.
- Climate-Ready Storage: Choose materials suited for high-humidity environments to ensure long-lasting durability.
These takeaways encapsulate the essence of the article, offering practical, actionable strategies to transform your bathroom storage effectively.
Best DIY Under-Sink Storage Ideas
Looking to maximize your bathroom’s storage potential? Check out these creative DIY under-sink storage solutions that will help keep your essentials organized and accessible.
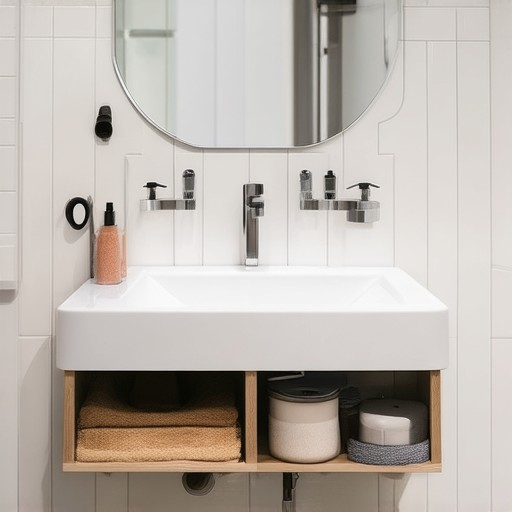
- Install Floating Shelves: Add floating shelves below the sink to store towels, toilet paper, or bath products. These shelves are easy to install and provide extra space for your needs.
- Use a Basket for Overflow Items: Keep smaller items like q-tips, cotton balls, or hair ties in a decorative basket placed next to the sink. This keeps surfaces tidy and items easily accessible.
- Create a Drawer for Small Parts: Convert an unused drawer under the sink into a dedicated space for makeup, skincare products, or small tools. Install a handle for easier access.
- Add a Pegboard: Mount a pegboard on the wall below the sink to hang frequently used items like razors, toothbrushes, or washcloths. This saves space and keeps things within reach.
- Utilize Vertical Space with Rods: Hang shower curtains, towels, or bath mats over rods installed along the wall near the sink. This adds extra storage without taking up floor space.
These DIY solutions are perfect for anyone looking to declutter their bathroom while maximizing functionality. By implementing these ideas, you’ll enjoy a cleaner, more organized space that meets all your storage needs.
For more bathroom organization tips, check out our Top Bathroom Storage Solutions guide and learn how to transform your space.
How to Create DIY Under-Sink Storage
Creating DIY under-sink storage can greatly enhance your bathroom organization. Here’s a step-by-step guide to help you achieve this:
- Measure the Space : Begin by measuring the area under your sink to determine the dimensions. This ensures your storage solutions fit perfectly without any wasted space.
- Select Containers and Brackets : Choose clear plastic bins or custom shelves. Adhesive brackets are a popular choice for secure installation, while others like screws or command strips may be suitable depending on your wall type.
- Install Brackets : Mark the wall locations and carefully install the chosen brackets. Ensure they are placed evenly to support the weight of your bins effectively.
- Attach Bins : Secure the bins over the brackets. Consider adding weights to keep them stable, especially if they hold heavier items.
- Organize Items : Group similar items together, such as towels, toiletries, and cleaning supplies. Use dividers and labels to enhance visibility and categorization.
- Choose Water-Resistant Materials : Opt for bins labeled as waterproof or moisture-proof to protect against humidity and prevent mold growth.
- Plan Layout and Tools : Sketch a layout to optimize space. Gather tools like a drill or screwdriver for installation. Ensure bins are tall enough for taller items and check weight limits of brackets.
- Consider Lighting : Install LED lights for better visibility while organizing. This also adds functionality to the space.
- Maintain Cleanliness : Regularly clean bins and check for leaks to keep the area dry and hygienic.
By following these steps, you can efficiently create a personalized under-sink storage solution tailored to your bathroom needs.

Best Ways to Build DIY Under-Sink Storage
Building DIY under-sink storage can transform your bathroom into a more organized and efficient space. Here are some effective approaches to maximize your under-sink area:
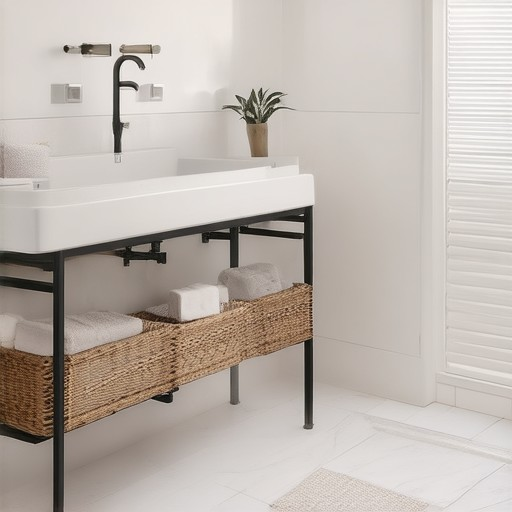
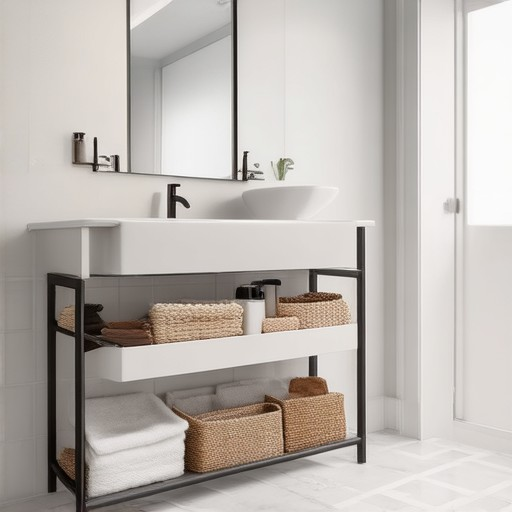
- Shelf Units: Install floating shelves or adjustable shelving systems to utilize vertical space. These can be customized in height and width to fit your specific needs.
- Baskets and Bins: Use decorative or functional baskets lined with waterproof lining to store items like towels, washcloths, or bath toys. Combine with shelves for added versatility.
- Adhesive Strips and Hooks: Utilize adhesive strips or command hooks to hang smaller items like toothbrushes, razors, or jewelry. Ensure they are placed in areas prone to moisture.
- Modular Storage Units: Consider pre-built or custom modular units that fit snugly under your sink. These can include drawers or cabinets for more secure storage.
- Waterproof Materials: Use materials like water-resistant plywood or MDF for shelves and cabinets to protect against moisture damage. Paint or stain them to match your bathroom decor.
- Installation Tips: Secure shelves using brackets or mounting strips. For taller units, ensure they are installed to avoid blocking the sink area and prevent water damage.
- Lighting Enhancements: Add LED strips under shelves for improved visibility and functionality while organizing.
For a step-by-step guide, visit our DIY Storage Ideas page to explore detailed plans and tips for creating your own under-sink storage solution.
How to Build DIY Under-Sink Storage
Building DIY under-sink storage can be a fun and practical project to organize your bathroom. Here’s a step-by-step guide to help you get started:
Tools and Materials Needed
- Saw (circular saw or hand saw)
- Measuring tape
- Plywood or MDF sheets
- Wood screws
- Drill and drill bits
- Sandpaper
- Paint or stain (optional)
- Wood glue
- Clamps (if needed)
Step 1: Measure and Plan
Before starting, measure the space under your sink to determine the dimensions of your storage unit. Consider the height, width, and depth to maximize space usage.
Step 2: Choose a Design
- Drawers: Ideal for holding larger items like towels or toilet paper.
- Open Shelves: Perfect for storing small items like toothbrushes or razors.
- Combination Units: Mix drawers and shelves for versatile storage.
Step 3: Cut the Wood
Use the saw to cut plywood or MDF sheets according to your planned dimensions. Ensure all pieces fit together snugly for a professional look.
Step 4: Assemble the Unit
Start by attaching the shelves and drawers to the base. Use wood screws to secure them in place. Double-check measurements to ensure everything aligns properly.
Step 5: Drill for Water Damage
Pre-drill holes in the bottom of your unit to allow water drainage. This prevents moisture damage and ensures longevity of your storage solution.
Step 6: Secure the Unit
Mount the unit to the wall using brackets or adhesive strips. Ensure it’s stable and won’t wobble. For added security, use wood glue along with screws.
Optional Features
- Add a Handle: Install a decorative handle for easier access.
- Include a Towel Bar: Attach a towel bar to the side for extra storage.
Step 7: Sand and Finish
Smooth out rough edges with sandpaper. Apply paint or stain if desired to give your storage unit a polished look.
Step 8: Install and Test
Once assembled, install the unit under your sink. Test its stability and check for any water leakage through the pre-drilled holes.
Tips for Success
- Maximize Space: Use vertical dividers or adjustable shelves for smaller sinks.
- Keep Essentials Accessible: Place frequently used items in open shelves or drawer compartments.
- Consider Bathroom Climates: Use weather-resistant materials if exposed to high humidity.
With these steps, you’ll have a custom-built under-sink storage solution tailored to your bathroom needs. For more DIY ideas, explore our DIY Home Projects guide.
Best Ways to Build DIY Under-Sink Storage
Maximizing storage under your sink can significantly enhance your bathroom organization. Here are some effective methods to create custom under-sink storage solutions:
- Install Floating Shelves: Measure the space under your sink and cut floating shelves to fit. Secure them using brackets or adhesive strips. These shelves provide flexible storage for towels, toiletries, and cleaning supplies.
- Add a Pull-Out Tray: Install a pull-out tray for easy access to small items like makeup or shaving products. This feature allows you to slide the tray out smoothly, keeping your essentials within reach.
- Hanging Organizers: Attach wall-mounted organizers to the sides of your sink or nearby walls. These can hold towels, washcloths, or bath toys, freeing up counter space while keeping items neatly stored.
- Build a Custom Drawer: Create a drawer beneath your sink for larger items like toilet paper, wipes, or cleaning products. Use soft-close hinges for a quiet, smooth opening and closing mechanism.
- Utilize Vertical Space Above the Toilet Paper Holder: Install a shelf above the toilet paper holder to store extra rolls. This adds vertical storage without disrupting the existing layout.
- Consider Modular Storage Units: Opt for pre-fabricated modular units that fit snugly under your sink. These systems often come with adjustable compartments, allowing you to customize storage based on your needs.
When planning your project, ensure you measure the space accurately and choose materials that match your sink’s dimensions. Consider using tools like a saw, measuring tape, and a level set for precise installation. Always wear protective gear and double-check measurements to avoid issues during assembly.
By combining these methods, you can create a functional and organized under-sink storage solution tailored to your bathroom’s unique needs.


0 Comments